
![How to Hang Anything [Infographic]](https://www.onlyinfographic.com/wp-content/uploads/2014/09/How-to-Hang-Anything-960x460.png)
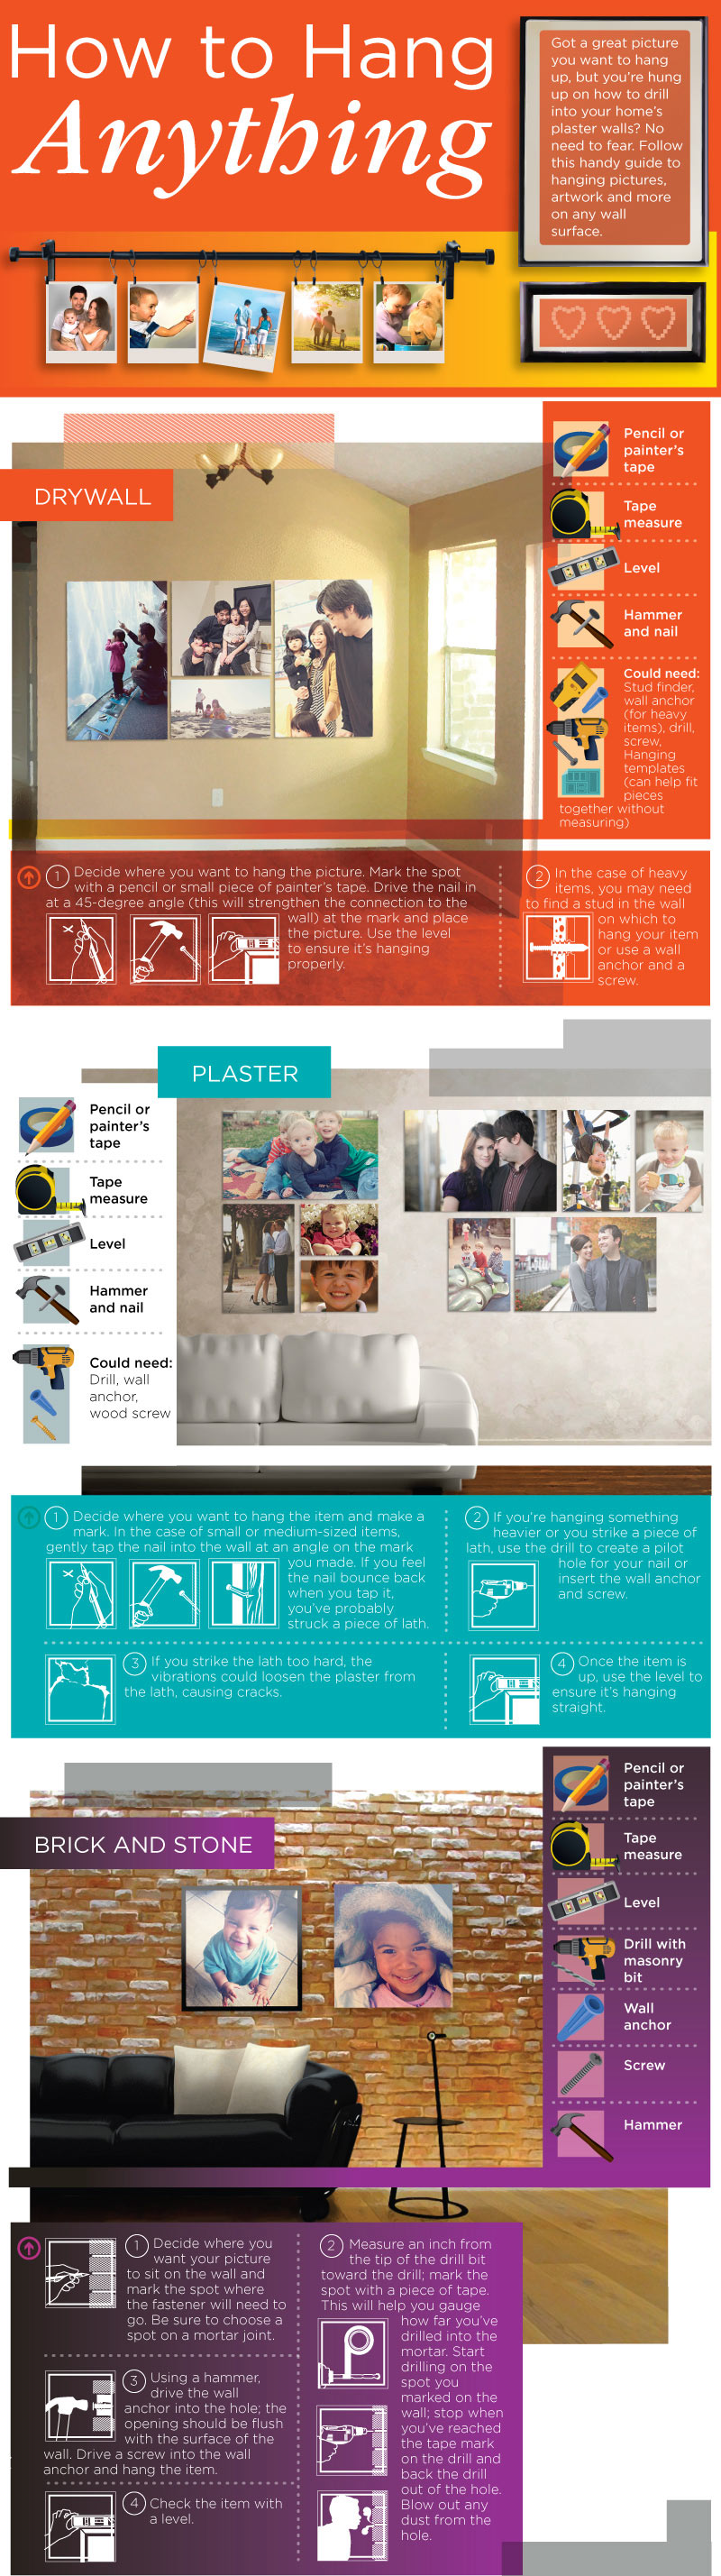
So, you just got the prints back from your latest photoshoot, or the newest pic of your grandkids. While frames and photos are always nice to look at, hanging them properly, and evenly, can be a challenge. www.shutterfly.com has created a helpful infographic entitled “How to Hang Anything”, explaining just how to hang those precious photos – no matter what your walls are made of.
For every type of wall, some basic tools will be needed, such as a pencil or painters tape, a tape measure, a level, and a hammer and nail. For drywall, you may need some additional supplies, such as a stud finder, wall anchor, drill, and screw hanging templates. For plaster walls, you’ll need the basic supplies, plus a drill, wall anchor, and a wood screw.
For brick and stone walls, you’ll need the basic items, minus the nail – but don’t worry, you’ll still need the hammer, plus some additional items, such as a drill with masonry bit, screw, and wall anchor. Concrete walls will require many of the same tools of the trade. A tile wall may seem imposing, however, with the extra tools, such as a drill with a carbide or diamond-tipped bit, coolant, and a few other easy-to-find items, you’ll be well on your way to a wall makeover.
No matter what media your walls are made of, this infographic outlines the exact supplies, tools, and steps you’ll need to take in order to hang your canvases and photos.

Like what you see? Comment, like, and share this infographic entitled “How to Hang Anything”, brought to you by www.shutterfly.com